The Virtual Server
Ubuntu 22.04 LTS (64bit) Jammy Jellyfish)
revised: 18-Apr-2023
For small entreprises, the offerings on virtual servers are most attractive as opposed to installing physical server. Here the focus is a virtual server (a linode from Linode.com but also called droplets in DigitalOcean), which among the many offering, current preference on this site is Ubuntu 22.04 64bit) a well-established Linux OS that is support up to April 2027 (with security updates available up to 2032). Moreover this Linux OS is well-discussed, and has many points for assistance available on the Internet for both Debian and Ubuntu (which is Debian-based). To host a mailserver as well, it is recommended to choose at least that offering with 2Gb ram ($12/mo) from Linode and DigitalOcean. Linode has a backup service for USD2.50/mo (recommended) For those, seeking to establish a website only, the minimum offerings ($5/mo) from both will be sufficient. For even modest budgets, other providers such as Racknerd.com, an adequate server can be as economical as $2/mo.
As one prepares to engage either one of these services, one will require:
- 1. a reliable, strong Internet service with an accessible email address.
- 2. a registered domain name. see Domain Name
- 3. the recommended open-source software as described earlier, installed and functioning. Domain Name
- 4. a SSH public-private key pair (using PuTTY) (Think of the analogy: padlock - as the public key and its key, its private key)
A good example of how to create the pair is found at HowtoForge.com - SSH Key Pair, using step 5 ONLY to generate the key pair. Both Linode and DigitalOcean assists one to use one's chosen public key. PuTTYgen is installed together with PuTTY PuTTY as a package. Note: A very simple or even a blank passphrase (preferred) can be used. - 4. b SSH public-private key pair (using Shell Assistant) Currently there no visible tutorials. So here is one in brief (some experience using PuTTY is useful here):
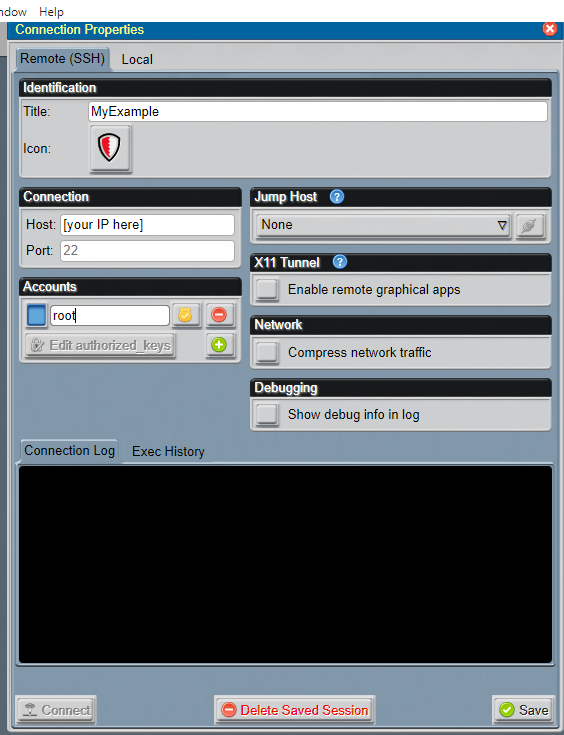
- 4.b Step01 - Open Shell Assistant, click on the green button and enter three things: A title, your IP and the user to connect with - usually it's the user: root but it can be a non-root user, eg. 'sammy'.
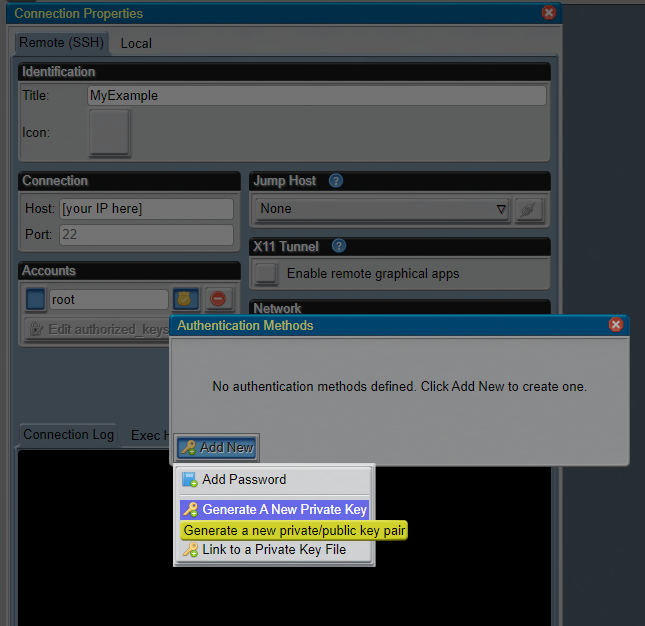
For larger image - 4.b Step02 - Generate a Key Pair (accept default RSA 2048) Note: One can already have a SSH pair handy (using PuTTYgen) and Shell Assistant can use that private key.
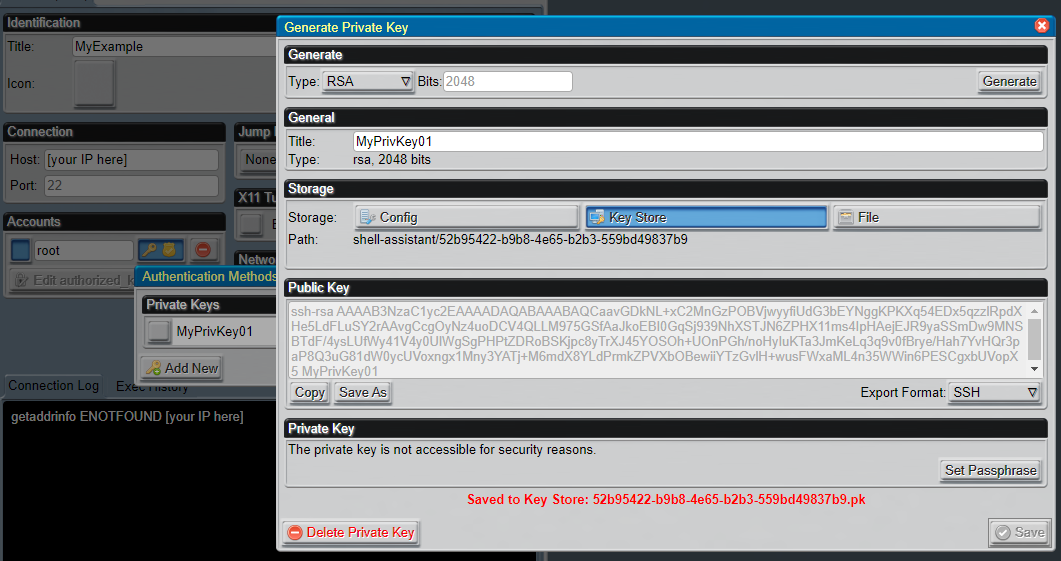
For larger image - 4.b Step03 - Copy the Public Key into a text file and save the private key to the store. Then also save the whole profile via the save button, bottom right.
For larger image - 4.b Step04 Prior to making the connection, one must first establish the public key on the server, please see: FTP - Tip#02
- 4.b Step05 While in Shell Assistant, drag the newly-created tab into the blue space to activate.
- 5. For the default user 'root', a password. Note that the user 'root' has privileges over the whole system and requires a very strong password (of at least 12 characters). See Password Creation
- 6. A regular user, which for purposes of consistancy, the user name 'sammy' is use throughout these pages. Any user such as 'sammy' also requires a strong password (of at least 9 characters).
- 7. (Optional) Using PuTTY: An alternative to the Shell Assistant, one can use PuTTy to log on. Of the number of online tutorials, this one is useful: Simplified.com - How to use public key authentication in PuTTY


