The Firewall
Critical first line defensive security
revised: 19-Feb-2022
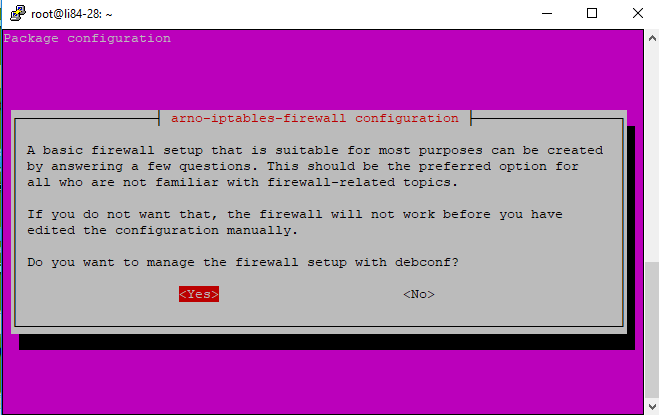
Without a firewall, there exist innumerable ports which the server has potentially to offer to interact with another device. Below is a brief outline of those ports which one chooses to remain accessible and all others closed by the firewall. While a firewall can provide other services, the instructions below focus wholly closing all but the planned for ports. For this purpose, Arno's Firewall is a good choice
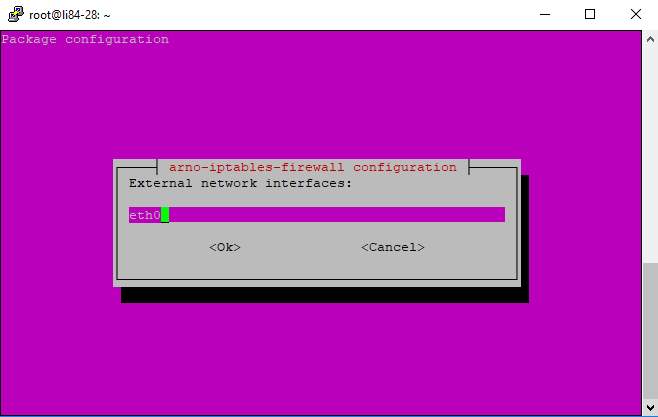
a. Interfaces
The default choice is 'ppp+'. However a very common interface was 'eth0' but this is changing to a variety of labels, most often starting with the letter 'e'. To find your specific interface, do the following command:
Don't brother with the sublabels: e&&&.XXX, just use the main label 'e&&&' (e&&& being some characters/numbers) in this setup.
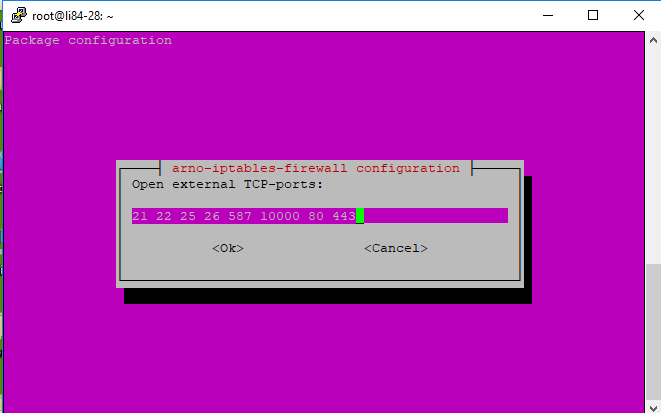
b. Overview of some of the most common(TCP) ports
Telnet: 23 - for communication with server - testing mail
FTP: 21 & 22 - for file uploading and downloading
Webmin: 10000 - self-explanatory
SMTP : 25 ,26 485 (SSL) & 587 (TLS) -sending mail
POP:110 & 995 (also UDP-port: 995)- receiving mail
IMAP:143, 993 & 585 as well as UDP-ports (993 &995) - online mailboxes
HTTP:80, 443 and [optional] 8443 - webpages (Openssl)
[option] Flask 5000 - commonly used for testing.
b. Setting up the Firewall: for a server providing basically a website on (TCP)port:80
Step01: Open PuTTy and as user: root; Copy and paste the following commands (after '#') in BOLD sequentially:
Should you wish to change anytime a setting or any of the ports, issue this command:
Lastly, check the status of the firewall:
If the firewall is not active
When active, the Arno firewall active settings can be seen in the Webmin module:[Networking]->[Linux Firewall] by clicking on the button "Revert Configuration" - true for both Webmin control pages of Linux Firewall IPv4 and IPv6.
Server - Contents